Settings
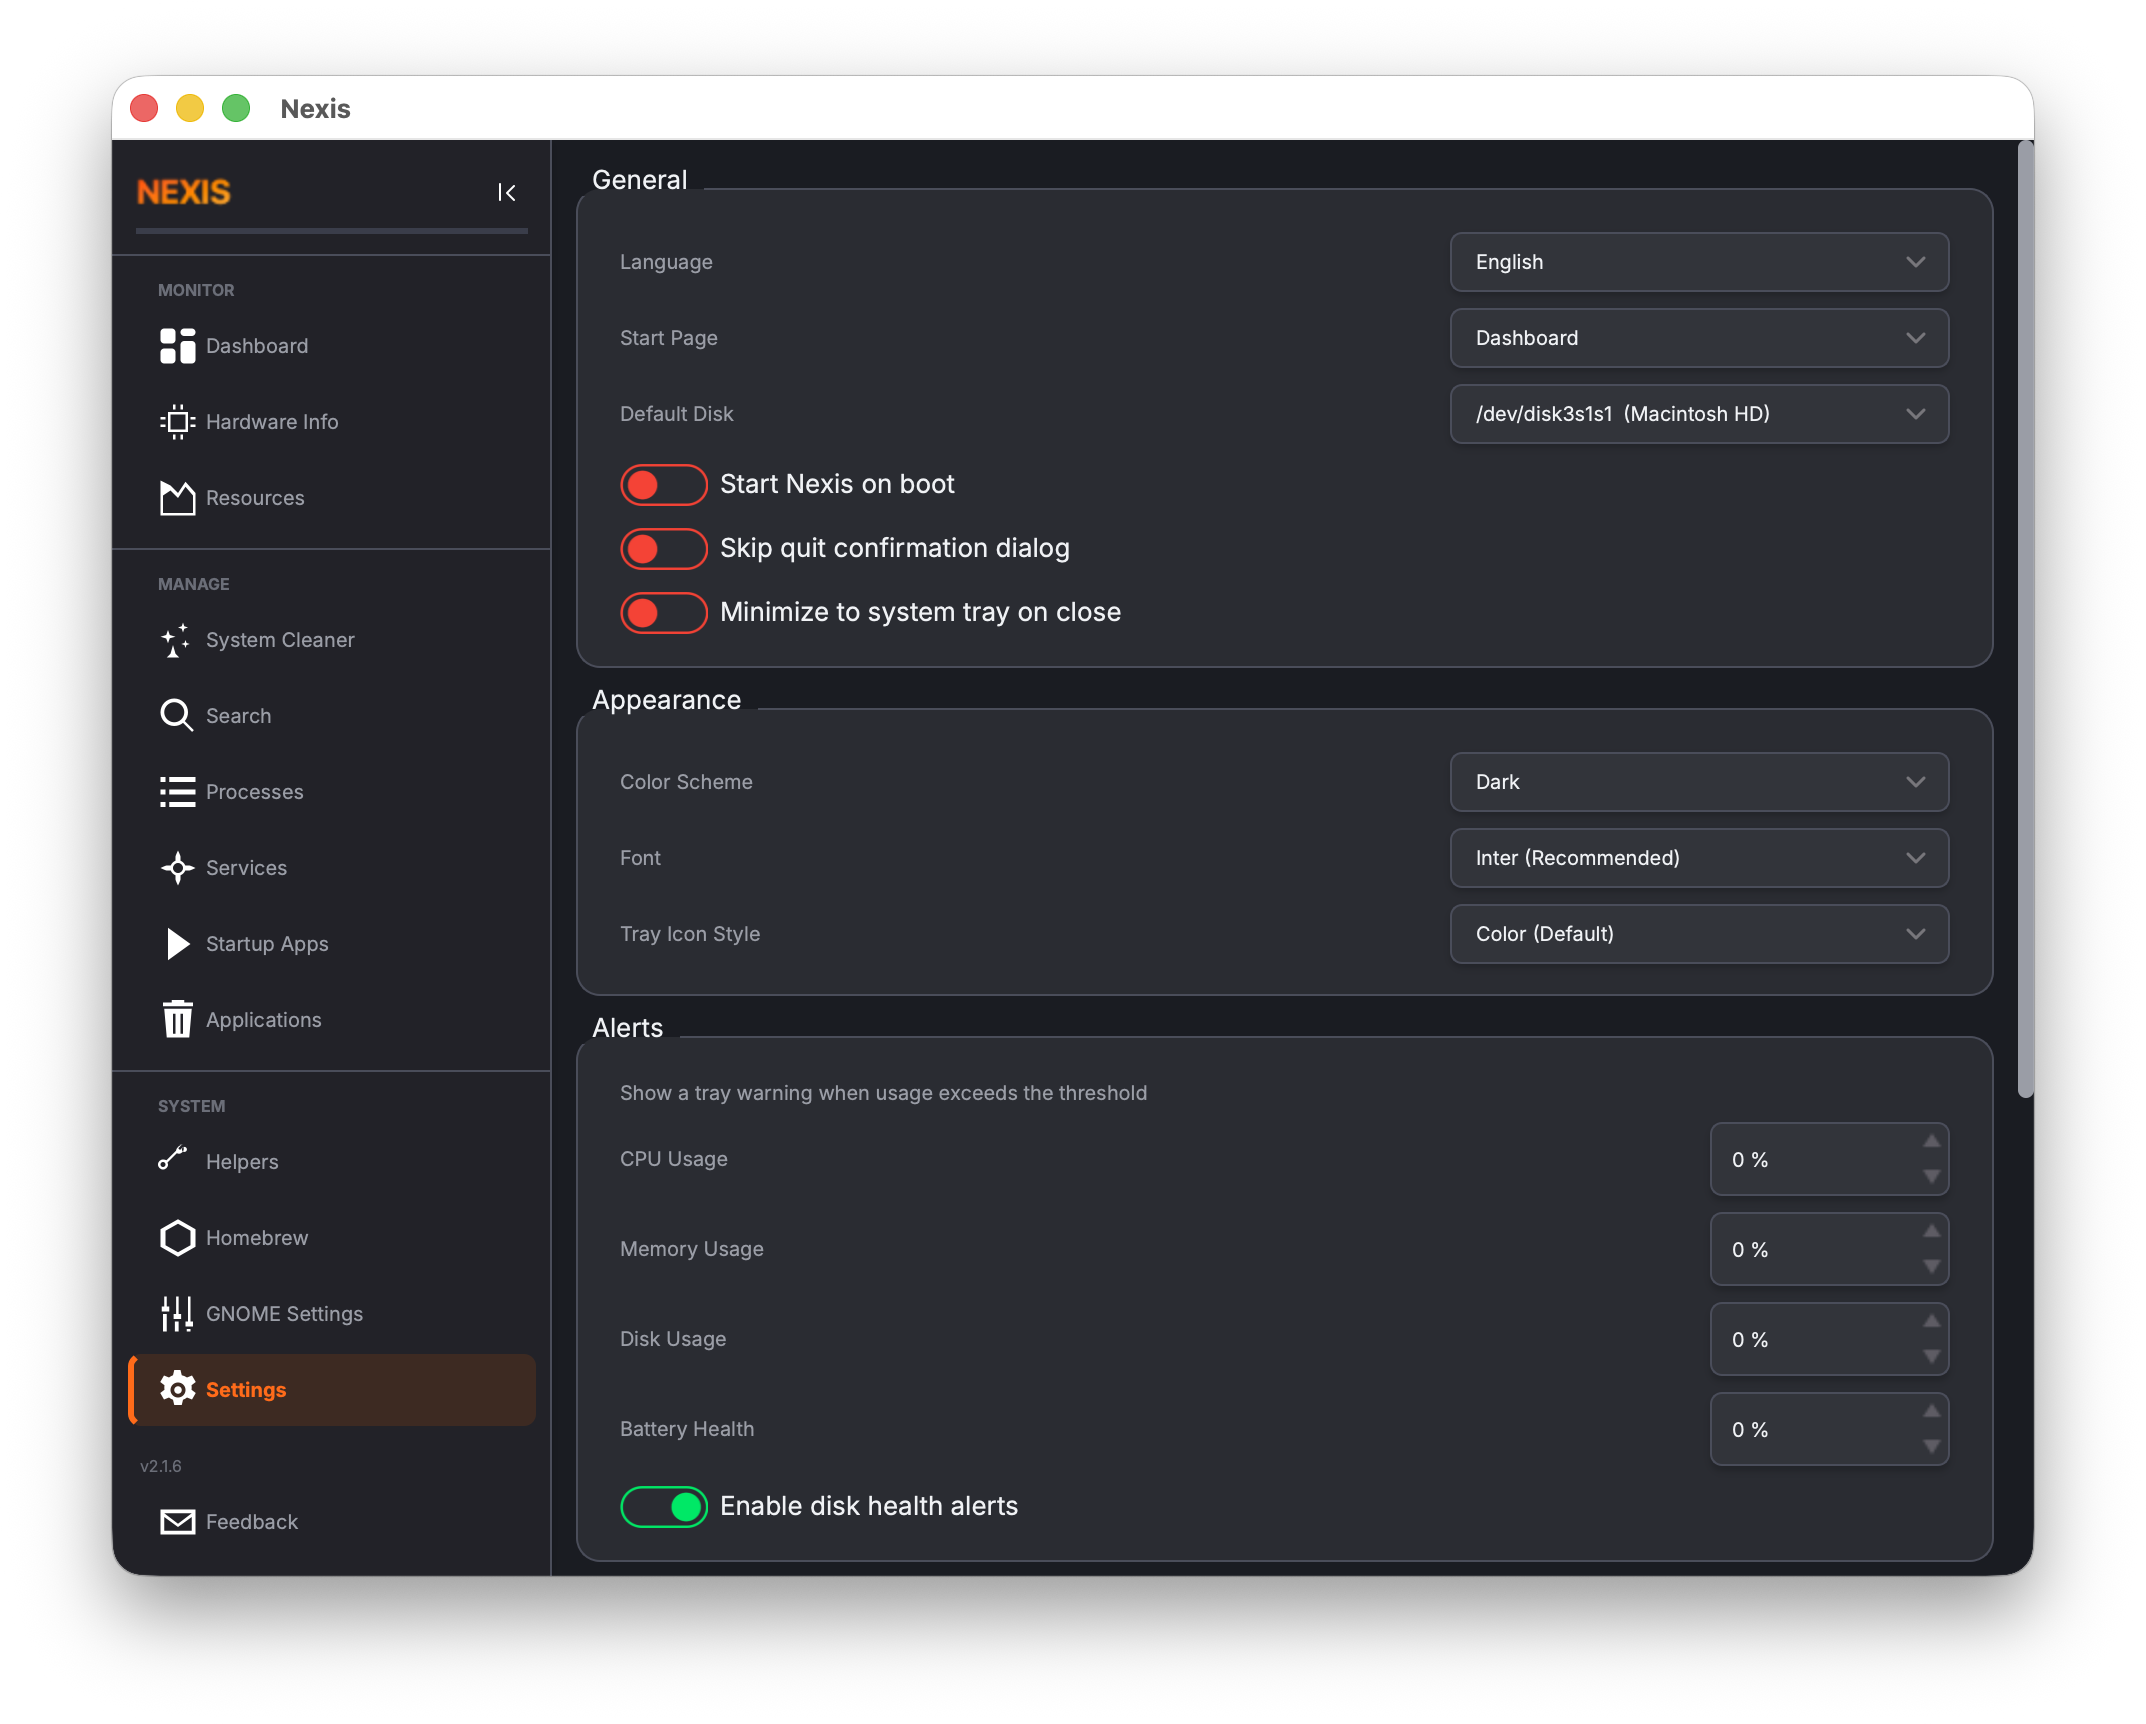
The Settings page is where you customize how Nexis looks, behaves, and notifies you. Everything from the language and color scheme to alert thresholds and automated cleaning schedules is controlled here.
Appearance
Language
Nexis supports 34+ languages with translations managed through community contributions. Select your preferred language from the dropdown and the interface updates immediately — no restart needed.
Available languages include: Arabic, Afrikaans, Catalan, Chinese (Simplified and Traditional), Czech, Danish, Dutch, English, Finnish, French, Galician, German, Greek, Hebrew, Hindi, Italian, Japanese, Kannada, Korean, Malayalam, Norwegian, Occitan, Polish, Portuguese, Romanian, Russian, Serbian, Spanish, Swedish, Turkish, Ukrainian, and Vietnamese.
Tip: If you notice a translation that could be improved, Nexis uses Crowdin for community translations. Check the project’s GitHub page for contribution links.
Color Scheme
Choose between three display modes:
| Mode | Behavior |
|---|---|
| Auto | Follows your operating system’s light/dark preference. When you toggle system dark mode, Nexis switches automatically. |
| Light | A warm cream-based theme designed for reduced eye strain in bright environments. |
| Dark | A deep charcoal theme with warm orange accents, ideal for low-light use. |
Font
Select the application font from the built-in options:
- Inter — A clean, modern sans-serif designed for screen readability
- Ubuntu — The classic Ubuntu font with a friendly, humanist style
- JetBrains Mono — A monospaced developer font, if you prefer that aesthetic
- System Default — Uses whatever font your operating system provides
The font change applies live across the entire interface.
Behavior
Start Page
Choose which page Nexis opens to when it launches. By default this is the Dashboard, but you can set it to any page — for example, Processes if you primarily use Nexis as a task manager, or Resources if you want to jump straight into charts.
Autostart
Toggle whether Nexis launches automatically when you log in to your computer.
Linux: This creates or removes a
.desktopfile in~/.config/autostart/.
macOS: This creates or removes a
.plistfile in~/Library/LaunchAgents/.
Minimize to Tray
When enabled, closing or minimizing the Nexis window hides it from the taskbar/Dock instead of quitting. The system tray icon remains visible, and clicking it restores the window. This is useful if you want Nexis running in the background for alerts and scheduled cleaning without taking up space in your taskbar.
When disabled (the default), closing the window quits the application normally.
Dashboard Configuration
Disk Partition
Select which disk partition is displayed on the Dashboard’s Disk tile. If your system has multiple drives or partitions, use this dropdown to choose the one you want to monitor by default. You can also change this directly from the Dashboard tile’s gear icon.
Alert Thresholds
Nexis can send you system tray notifications when certain metrics exceed thresholds you define. Each threshold is configured as a percentage:
| Threshold | What It Monitors |
|---|---|
| CPU Alert | Fires when overall CPU usage stays above this percentage |
| Memory Alert | Fires when RAM usage exceeds this percentage |
| Disk Alert | Fires when disk usage on your monitored partition exceeds this percentage |
| Battery Health | Fires when battery health drops below this percentage |
Set each slider to the level that matters to you. For example, setting the disk alert to 90% means you get a notification when your drive is nearly full.
Disk Health Alert
A separate toggle enables tray notifications specifically for failing drives. When enabled, Nexis checks SMART health verdicts periodically and alerts you if any drive reports a Caution or Critical status.
Update Notifications
Toggle whether Nexis sends a tray notification when new package updates become available. When enabled, a notification fires the first time the update count goes from zero to one or more — so you are alerted once, not repeatedly. The pending update count is also shown as a badge on the APT / Homebrew sidebar button.
Tools
Disk Analyzer
Choose your preferred disk usage visualization tool. This is the application that opens when you click the Disk Usage Launcher on the Resources page.
The available options depend on your platform:
Linux: Baobab (GNOME Disk Usage Analyzer), Filelight, QDirStat, or ncdu.
macOS: GrandPerspective, DaisyDisk, or OmniDiskSweeper.
If your preferred tool is not in the list, select Custom and enter the full path to the application.
Scheduled Cleaning
The scheduled cleaning section lets you automate the System Cleaner so junk files are removed on a regular basis without manual intervention. There are several sub-features here:
Quick Setup
A toggle that creates a sensible default cleaning schedule with one click. This is the fastest way to get started with automated cleaning if you do not need fine-grained control.
Schedule Manager
Open the full schedule manager to create, edit, and delete cleaning schedules. Each schedule lets you configure:
- Frequency — Daily, every N days, weekly, or monthly
- Categories — Which types of junk files to include (package cache, crash reports, logs, app caches, trash, dev tool caches)
- Minimum file age — Only clean files older than a certain number of days
Threshold Alerts
Configure a size threshold (in GB) that triggers a tray notification when cleanable files exceed that amount. For example, set it to 5 GB to get reminded whenever there is more than 5 GB of junk to clean.
Cleaning Notifications
Toggle whether you receive a tray notification when an automated clean completes, showing how much space was freed.
History Viewer
Review past cleaning runs — when they happened, which categories were cleaned, and how much space was recovered. This is useful for verifying that your schedules are working as expected.
About
At the bottom of the Settings page, you will find:
- Version display — The current Nexis version number
- GitHub link — Opens the Nexis developer’s GitHub profile
- Feedback button — Takes you directly to the GitHub Issues page where you can report bugs or request features using the provided templates
What’s Next
See the complete list of keyboard shortcuts in the Keyboard Shortcuts reference.